

Views: 0 Author: Site Editor Publish Time: 2026-09-16 Origin: Site


While the core appeal of modular wastewater infrastructure lies in its rapid deployment, physical installation is merely one piece of the puzzle. Overlooking the nuances of the commissioning phase—particularly the critical transition from mechanical setup to biological stabilization—often results in regulatory compliance issues, premature equipment degradation, and costly project delays. Simply placing a steel module on a concrete foundation doesn't make it ready to process raw sewage. All too often, operators hastily introduce live wastewater before the bacterial colony is prepared for the organic load, triggering immediate permit violations and system shock. This comprehensive guide outlines the precise engineering sequence needed to successfully commission a containerized plant on site. From dry testing and hydraulic checks to biological seeding, SCADA integration, and final compliance validation, adhering to these essential steps will transform a dormant steel structure into a fully operational, compliant biological treatment facility.
Site Readiness is Non-Negotiable: A seamless commissioning process demands verified civil foundations, reliable power grids, complete inlet and outlet piping, and active telemetry networks well before the container touches the ground.
Phased Testing Prevents Catastrophic Failures: To safely isolate faults and safeguard capital equipment, commissioning must strictly adhere to a dry-to-wet progression: mechanical checks first, followed by clean water testing, and only then, wastewater introduction.
Biological Acclimation Dictates Timelines: Mechanical installation may only take a few days, but cultivating an active biomass in an MBBR wastewater treatment system or similar biological setup typically takes 2 to 6 weeks to ensure stable discharge compliance.
Vendor Accountability: Conducting a rigorous Site Acceptance Test (SAT), documenting HAZOP reviews, and executing a thorough operator handover are essential for maintaining long-term reliability and protecting equipment warranties.
Effective commissioning actually begins weeks before the equipment even arrives. Thorough site preparation lays the groundwork for the physical stability and operational safety of the entire treatment process. Cutting corners on civil and electrical prerequisites is a surefire way to invite mechanical breakdowns, pipe shearing, and electrical faults down the line.
Proper foundation leveling demands exacting engineering tolerances. Once fully loaded, a treatment module weighs tens of tons, and the dynamic movement of water introduces significant additional stress. Engineers must ensure the subgrade compaction hits at least 95% Standard Proctor. Furthermore, the concrete pad needs a minimum 28-day curing period to reach its 3000 PSI design strength before the module is positioned. An uneven foundation can cause the steel chassis to warp under heavy hydraulic loads, which misaligns internal PVC piping, stresses welded tank seams, and can ultimately lead to catastrophic bulkhead failure.
Utilize a laser level to verify that surface deviation remains under 5mm across a 10-meter span. It is also crucial to install vibration-damping mounts at the anchor points. These elastomeric mounts effectively absorb the kinetic energy produced by heavy rotary blowers and transfer pumps. Moreover, securing the unit with chemical epoxy bolts ensures the module is well-protected against high winds and potential seismic activity.
Upon the unit's arrival, carry out a meticulous post-transit inspection, paying close attention to the internal anti-corrosion epoxy coatings. Transport vibrations and lifting maneuvers can sometimes cause chipping. If bare carbon steel is exposed to raw sewage, it will rust rapidly, threatening the tank's structural integrity in a matter of months. Be sure to patch any damaged spots with marine-grade epoxy before any fluids are introduced.
Securing environmental permits early is just as vital. Regulatory agencies require formal notification prior to the introduction of live wastewater into the system. Operating without the necessary signed discharge permits invites immediate site shutdowns, steep financial penalties, and potential legal action against site management.
Establishing a stable power supply is your next critical priority. Use a multimeter and a phase rotation meter to verify the incoming three-phase power. Double-check voltage levels and ensure the phase balance remains within a 2% margin. Phase imbalances can cause pump motors to overheat, rapidly degrading stator insulation and leading to premature failure. Additionally, confirm that the grounding system complies with local industrial electrical codes, targeting a measured resistance to ground of less than 5 ohms.
Next, integrate the backup generator with the main automatic transfer switch (ATS). Wastewater treatment processes simply cannot afford to pause during grid outages. A prolonged loss of power will kill off the biological colony through oxygen starvation in as little as 4 to 6 hours. Always test the ATS under load to guarantee the generator can seamlessly take over the blower and pump loads without tripping any breakers.
With power secured, finalize all hydraulic connections. Attach the inlet screening mechanisms and route the piping for the equalization tank. Ensure the final effluent discharge is securely routed to its designated outfall. It's imperative to install bypass lines right away; these lines give operators the ability to divert unexpected hydraulic surges or toxic industrial spills away from the fragile, developing biological process during the initial startup phase.
Setting up local network connectivity early on is also essential. SCADA systems and remote telemetry rely on stable internet access, whether through hardwired Ethernet or robust industrial 4G/5G cellular routers. Off-site engineers depend on this continuous data stream to monitor the startup sequence, analyze sensor trends, and troubleshoot PLC logic faults in real time.
Confirm the concrete pad's curing time and check surface level tolerances.
Install and properly torque chemical anchor bolts equipped with vibration dampeners.
Perform megger testing on all incoming power cables.
Verify the functionality of the automatic transfer switch alongside the backup generator.
Finish assembling and pressure-test all external inlet and outfall piping.
Configure and validate the IP settings for the SCADA router.
Dry commissioning allows you to isolate mechanical and electrical faults without dealing with the complications of fluids. During this stage, you will test moving components, verify sensor wiring, and validate all safety protocols. This crucial phase guarantees that the hardware within the Containerized Sewage Treatment Plant operates exactly as intended before a single drop of water enters the system.
Carefully inspect all internal components after transit, as transport logistics inevitably subject the module to intense vibrations and shock loads. Check for any loosened flange fittings and retorque them in a star pattern according to the manufacturer’s specific foot-pound recommendations. Keep an eye out for visible pipe stress near pump volutes, as this usually indicates misalignment. Additionally, examine the fine-bubble aeration grids at the base of the biological tanks for cracked PVC headers or loose diffuser membranes.
Next, conduct manual rotation checks on all rotating equipment. Spin the shafts of transfer pumps, rotary lobe blowers, and submersible mixers by hand to ensure they move freely, without any grinding or binding. Confirm that oil levels are adequate in all gearboxes and blower housings. Once everything clears the manual check, apply a brief burst of electrical power (bumping the motor) to confirm the correct directional rotation. Accidentally running a centrifugal pump backward can instantly damage the impeller and destroy its mechanical seals.
Don't forget to verify the operational status of all auxiliary systems. Test the internal HVAC and ventilation fans to ensure adequate airflow, which is critical for preventing the buildup of explosive gases like methane and protecting operators from hydrogen sulfide exposure when entering the module. Finally, activate the odor control biofilters and confirm that the extraction fans are pulling a sufficient vacuum across the covered tanks.
Electrical engineers must then execute rigorous point-to-point testing to verify the physical wiring connecting the main control panel (MCP) to the field instruments. Manually trigger the ultrasonic level sensors by positioning a flat board at varying distances to simulate changing water levels. Use a loop calibrator to simulate 4-20mA signals through the electromagnetic flow meters. Also, expose the dissolved oxygen (DO) probes to ambient air to confirm their 100% saturation calibration baselines.
Next, thoroughly verify the Programmable Logic Controller (PLC) sequences. Force inputs through the software interface to evaluate output responses. Trigger high-level alarms to confirm that the feed pumps automatically shut down as programmed. It is equally important to test the emergency stop (E-stop) functionalities under these simulated dry conditions. Hitting the E-stop should instantly cut power to all rotating equipment and activate a hardwired alarm beacon.
Finally, confirm a seamless digital handshake between the local PLCs and remote monitoring dashboards. Data packets need to transmit cleanly to the cloud server with zero packet loss. This reliable telemetry link is vital, as it allows off-site engineers to track commissioning progress, remotely adjust variable frequency drives (VFDs), and push logic updates if any sequence modifications become necessary.
Dry Commissioning Task | Execution Methodology | Acceptance Criteria |
|---|---|---|
Flange Torque Verification | Use a calibrated torque wrench in a standard star pattern. | All bolts meet exact OEM torque specifications with no visible gasket pinching. |
Motor Rotation Check | Perform a manual spin, followed by a brief 1-second power bump. | Smooth manual rotation; powered rotation perfectly matches casing arrows. |
Point-to-Point Wiring | Deploy a loop calibrator to test 4-20mA analog signals. | HMI accurately displays simulated values with zero signal noise. |
E-Stop Validation | Physically strike the emergency stop button. | Instant power cutoff to all motors; PLC successfully logs the fault event. |
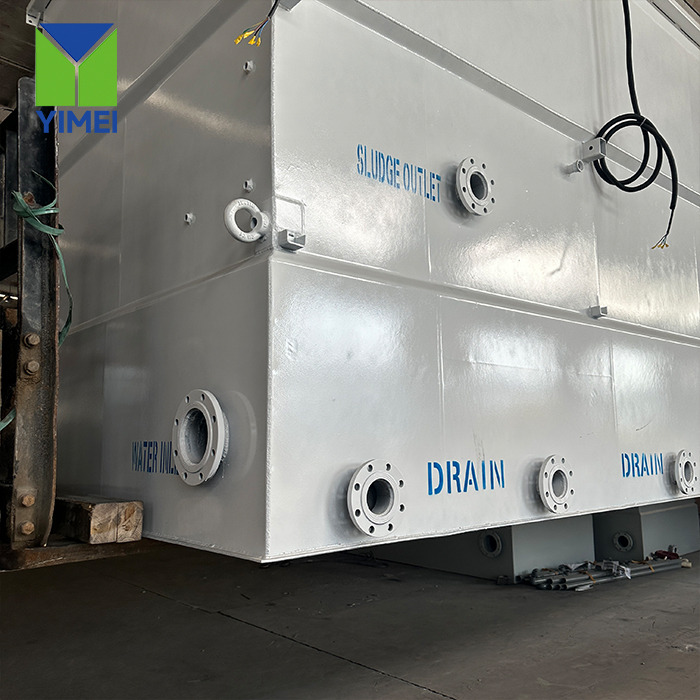
Wet commissioning marks the transition from a static, dry mechanical setup to an active, dynamic fluid system. By utilizing clean water, you can safely test hydraulic capacities, verify pump curves, and confirm overall tank integrity. Doing this with clean water eliminates the risk of biohazard exposure in the event a pipe bursts, a valve fails, or a tank springs a leak during pressure testing.
Always fill the system exclusively with clean municipal or well water. Spotting and addressing leaks with clean water is both safe and straightforward; attempting to repair a faulty bulkhead or a weeping weld is significantly more complicated and hazardous when the tank is full of raw sewage. Fill the tanks slowly—at a rate of roughly one meter of depth per hour—to give the steel structure ample time to settle and distribute the heavy load evenly across the vibration mounts.
Proceed to execute strict hydrostatic testing on the containerized tanks. Keep a close eye on the steel bulkheads for any structural deflection using a string line or laser. Carefully verify the weld integrity along all internal seams, and inspect the watertight seals around pipe penetrations and flanged connections. Once full, hold the water at maximum capacity for 24 hours to confirm absolute stability. Any noticeable drop in the water level indicates a hidden leak that must be resolved immediately.
Next, perform pressure testing on all chemical dosing lines. Systems that utilize coagulants, flocculants, or pH adjusters rely on small-diameter PVC or flexible dosing tubing. Pumping clean water through these lines at maximum operating pressure is crucial for preventing hazardous chemical leaks during live operations, thereby protecting expensive equipment and shielding operators from potential acid or caustic burns.
Test both transfer pumps and chemical dosing pumps against their designed flow curves. Utilize a calibrated flow meter, or perform a simple volumetric bucket test for the smaller dosing pumps, to ensure they deliver the exact volumetric accuracy specified in the engineering drawings. Briefly dead-head the centrifugal pumps by closing the discharge valve to verify they can reach their designed shutoff head pressure. If flow rates deviate from the established baseline, be sure to adjust the VFDs accordingly.
Evaluate the aeration system both visually and metrically. Turn on the rotary blowers and open the air header valves. Observing the water surface in the aeration tank, you should see a uniform rolling boil pattern across the entire area, which confirms even bubble distribution from the diffusers. Additionally, check the blower discharge pressure gauges; high pressure usually points to clogged diffusers or closed isolation valves. Make sure there are no dead zones in the tank corners, as these areas allow sludge to settle, turn septic, and unnecessarily consume vital treatment capacity.
Fill the tanks with clean water at a measured rate of roughly 1 meter per hour.
Perform a full 24-hour hydrostatic hold test to confirm the integrity of welds and bulkheads.
Pressure-test all chemical dosing lines using clean water.
Confirm pump flow rates via volumetric testing and fine-tune VFDs as needed.
Turn on the blowers and visually verify that the aeration grid delivers a uniform bubble distribution.
Biological commissioning is arguably the most complex phase of the entire deployment, marking the transition from mechanical engineering to microbiology. Cultivating a robust, healthy bacterial colony demands patience, precise nutrient management, and stringent environmental control. Attempting to rush this delicate phase practically guarantees biological shock and poor effluent quality.
To kickstart biological activity within the tanks, you have a couple of options. While natural cultivation relies on the bacteria inherently present in raw sewage—a method that is cost-effective but notoriously slow, often taking months to meet compliance—seeding drastically accelerates the timeline.
Operators typically seed the tanks with liquid activated sludge, transported via vacuum truck from a well-functioning local municipal plant. Alternatively, commercial freeze-dried bacterial cultures can be rehydrated directly on site. Seeding introduces a massive initial population of heterotrophic and autotrophic bacteria, immediately boosting the Mixed Liquor Suspended Solids (MLSS) to a highly viable starting concentration.
It is essential to understand the mechanics of biofilm development within an MBBR wastewater treatment system. Initially, the high-density polyethylene (HDPE) media carriers tend to repel water. To adhere to the plastic, the bacteria must excrete extracellular polymeric substances. Over the course of two to three weeks, a sticky, light-brown biofilm will gradually coat the carriers. It is this very biofilm that performs the critical biological degradation of organics and ammonia.
Always verify the Carbon:Nitrogen:Phosphorus (C:N:P) ratio of the incoming influent, aiming for the ideal biological growth ratio of 100:5:1. Industrial wastewater or sewage from remote worker camps frequently lacks adequate carbon or phosphorus. Should the raw wastewater prove deficient, you must manually supplement these nutrients. Adding urea for nitrogen or phosphoric acid for phosphorus will help sustain the biomass until the influent profile naturally stabilizes.
Never subject a new biological system to 100% of its design load right out of the gate. Instead, implement a strict step-feeding strategy. Introduce raw sewage at just 25% of the design flow for the first three days. Then, gradually step up the organic and volumetric load to 50% by day seven, and up to 75% by day fourteen. This methodical step-feeding prevents toxic shock, allowing the bacterial reproduction rate to smoothly match the available food supply.
Throughout this phase, diligently monitor critical parameters on a daily basis. Track Dissolved Oxygen (DO) levels to ensure they stay firmly between 2.0 and 3.0 mg/L. Excessive air can shear the delicate biofilm right off the media, while insufficient air will create unwanted anaerobic conditions. Keep an eye on the pH to maintain a neutral environment (6.5 to 8.0). Additionally, measure the MLSS and perform 30-minute settling tests (SV30) to accurately track bacterial growth density and overall sludge settleability.
Be prepared to tackle cold-weather commissioning challenges aggressively. In freezing temperatures, bacteria can go dormant, which halts the treatment process entirely. If you are commissioning during the winter, utilize immersion heaters in the equalization tank to gently warm the influent. Applying insulated container cladding helps trap the heat generated by the blowers and exothermic biological reactions. Maintaining an optimal water temperature (ideally above 15°C) is absolutely mandatory for rapid, healthy biofilm development.
Once the biological processes stabilize and the biofilm matures, it’s time to prove the system can handle a full load. This performance evaluation relies heavily on rigorous laboratory testing and meticulous data logging. Before the project can be officially handed over, the final effluent must consistently meet all legal discharge limits outlined in your environmental permits.
Start by defining rigorous sampling protocols. While grab samples provide a useful quick snapshot, 24-hour composite samplers yield an accurate, average performance metric that regulators rely on. It is essential to maintain a strict chain of custody for all lab samples. Routinely measure both influent and effluent concentrations for Biochemical Oxygen Demand (BOD), Chemical Oxygen Demand (COD), and Total Suspended Solids (TSS).
Furthermore, test for Ammonia (NH3) and Total Phosphorus (TP) to confirm nutrient removal efficiency. Benchmark all laboratory results directly against local environmental discharge regulations. Whether your site follows EPA guidelines, European directives, or WHO standards, consistently achieving these performance metrics over a continuous 7-day testing period is a prerequisite for formal site acceptance.
Hitting initial compliance is just the starting point; the next step is fine-tuning the process for long-term efficiency and operational stability. Adjust aeration cycles intelligently based on feedback from the DO probes. You must also optimize the Waste Activated Sludge (WAS) removal rates to maintain the ideal sludge age (Solids Retention Time). Wasting too much sludge will deplete the active bacteria, while wasting too little allows old, dead sludge to carry over and compromise the final effluent.
Use jar testing to accurately calibrate the chemical dosing pumps. If the effluent exhibits high phosphorus levels, incrementally increase the coagulant dosage while monitoring floc formation. For systems relying on sodium hypochlorite or UV technology for final disinfection, carefully adjust contact times or lamp intensity based on the latest fecal coliform lab results.
It is important to proactively address the inherent trade-offs of operating a Compact sewage treatment system. You have to balance energy consumption with overall treatment efficiency. For example, lowering the blower speed saves electricity, but it risks dropping DO below critical levels during peak flow periods. By thoughtfully fine-tuning VFD settings and programming diurnal flow curves into the PLC, you can find the perfect sweet spot between maximizing effluent clarity and minimizing operational costs.
Realistically, commissioning rarely goes perfectly on the first try. Anticipating common mechanical and biological hurdles empowers site engineers to react swiftly and effectively. Proactive mitigation strategies not only protect valuable equipment but also prevent costly permit violations and keep the biological development timeline firmly on track.
Foaming is one of the most frequent pitfalls encountered during startup. A thick, brown, greasy foam typically points to a low Food-to-Microorganism (F/M) ratio or the troublesome presence of filamentous Nocardia bacteria. On the other hand, white, billowing foam usually suggests the system is either under-loaded with organics or is suffering from a sudden surfactant (detergent) spike. Another major concern is the washout of MBBR media, which can occur if the stainless steel retention screens fracture under hydraulic surges or become blinded by rags and debris.
Sensor fouling is another issue that frequently plagues new installations. Debris like rags, hair, and grease can quickly coat DO probes and level floats, sending inaccurate data straight to the PLC. This bad data can cause pumps to run dry or lead to tank overflows. Additionally, unexpected odor emissions can arise if the ventilation system becomes unbalanced, the biofilter media is allowed to dry out, or if sludge turns anaerobic in the clarifier due to a malfunctioning scraper mechanism.
Commissioning Risk | Primary Root Cause | Actionable Mitigation Strategy |
|---|---|---|
Biological Foaming | Low F/M ratio, Nocardia bacteria, or unexpected surfactant spikes. | Increase WAS wasting rates; temporarily apply anti-foaming agents; manually knock down foam using an effluent water spray. |
Media Washout | Damaged retention screens or severe hydraulic flow surges. | Leverage equalization tank bypass lines; perform daily inspections and manual brushing of stainless steel screens. |
Sensor Fouling | Accumulation of grease, wipes, and rags on critical probes. | Establish a weekly manual cleaning routine; install automated air-blast cleaners directly on DO probes. |
Odor Emissions (H2S) | Anaerobic conditions or an unbalanced HVAC extraction system. | Boost blower VFD speeds to increase DO; fine-tune biofilter extraction fans; ensure sludge is wasted on a regular schedule. |
Always rely on the equalization tank to absorb sudden flow spikes and prevent catastrophic media washout. Make routine sensor calibration using standard solutions a mandatory practice. Furthermore, dynamically tune the ventilation system as the biological load increases and gas production naturally rises.
Even the most brilliant engineering will fail if site operators are poorly trained. Begin by outlining the necessary documentation for a successful Site Acceptance Test (SAT). Ensure the vendor provides comprehensive red-lined as-built drawings, full PLC logic backups on a physical USB drive, detailed O&M manuals, and all applicable OEM warranty certificates.
Following documentation, execute a robust and comprehensive training curriculum for the on-site team. Teach operators the importance of routine maintenance schedules, such as regularly greasing blower bearings and cleaning screens. Train them thoroughly on alarm response protocols, ensuring they know exactly how to react to a high-level fault or a sudden motor overload. Also, rigorously cover safe chemical handling—including the proper use of PPE for coagulants and disinfectants—and enforce strict Lock-Out/Tag-Out (LOTO) procedures to guarantee electrical safety.
Finally, carefully detail all sludge desludging procedures. Operators must know how to accurately measure the sludge blanket depth in the clarifier using a sludge judge, and they must understand how to operate the sludge transfer pumps efficiently. Investing in proper training ensures that the Integrated wastewater system remains fully functional, completely safe, and strictly compliant long after the commissioning engineering team has left the site.
Before signing any procurement contract, request a detailed, day-by-day commissioning schedule from your prospective wastewater engineering partner.
Arrange a thorough pre-delivery site inspection to confirm proper concrete pad curing, precise anchor bolt placement, and overall electrical grid stability.
Secure a reliable contract with a certified local laboratory to manage the 24-hour composite sampling that is mandatory for final discharge compliance validation.
Designate a dedicated site operator to shadow the vendor's engineering team throughout both the dry and wet testing phases, building invaluable hands-on familiarity with the system.
A: The commissioning timeline is essentially split into two phases. Initial mechanical and wet testing typically spans 3 to 7 days. However, biological stabilization takes significantly longer—usually 2 to 6 weeks—depending heavily on wastewater temperatures, the chosen seeding methods, and the specific organic load profile of the incoming influent.
A: Dry commissioning focuses on electrical and mechanical verification without the use of any fluids, allowing engineers to safely check motor rotation, sensor wiring, and PLC logic. Wet commissioning, on the other hand, introduces clean water into the system to safely test hydraulic integrity, verify pump flow rates, and confirm tank watertightness without risking any biohazard exposure.
A: Operators typically seed the system by introducing liquid activated sludge from an existing municipal plant, or by utilizing commercial freeze-dried bacterial cultures. This jump-starts biofilm growth on the plastic media carriers. During this time, engineers must carefully verify and balance the Carbon:Nitrogen:Phosphorus ratio to properly sustain and nourish the growing bacterial colony.
A: No, it cannot. Hitting a new system with 100% of its design load immediately will almost certainly cause severe biological shock and media washout. Operators must implement a careful step-feeding strategy—starting at roughly 25% capacity and gradually increasing both the volumetric and organic loads as the bacterial colony successfully multiplies and matures.
A: The site must be equipped with stable 3-phase power and a verified backup generator connection. Civil foundations need to be perfectly leveled and fully cured. Furthermore, all inlet and outlet piping must be finalized, and reliable local internet connectivity must be active to support essential SCADA telemetry.
A: Should the system fail the SAT, the vendor must enter a dedicated troubleshooting loop to identify and resolve any underlying mechanical or biological faults. Final project handover—along with any final payments—will be strictly withheld until the system can consistently meet all required environmental discharge compliance metrics.


